Navigating the AASHTO Clear Zone Chart: A Complete Information to Roadside Security
Associated Articles: Navigating the AASHTO Clear Zone Chart: A Complete Information to Roadside Security
Introduction
With enthusiasm, let’s navigate by means of the intriguing matter associated to Navigating the AASHTO Clear Zone Chart: A Complete Information to Roadside Security. Let’s weave fascinating data and supply recent views to the readers.
Desk of Content material
Navigating the AASHTO Clear Zone Chart: A Complete Information to Roadside Security
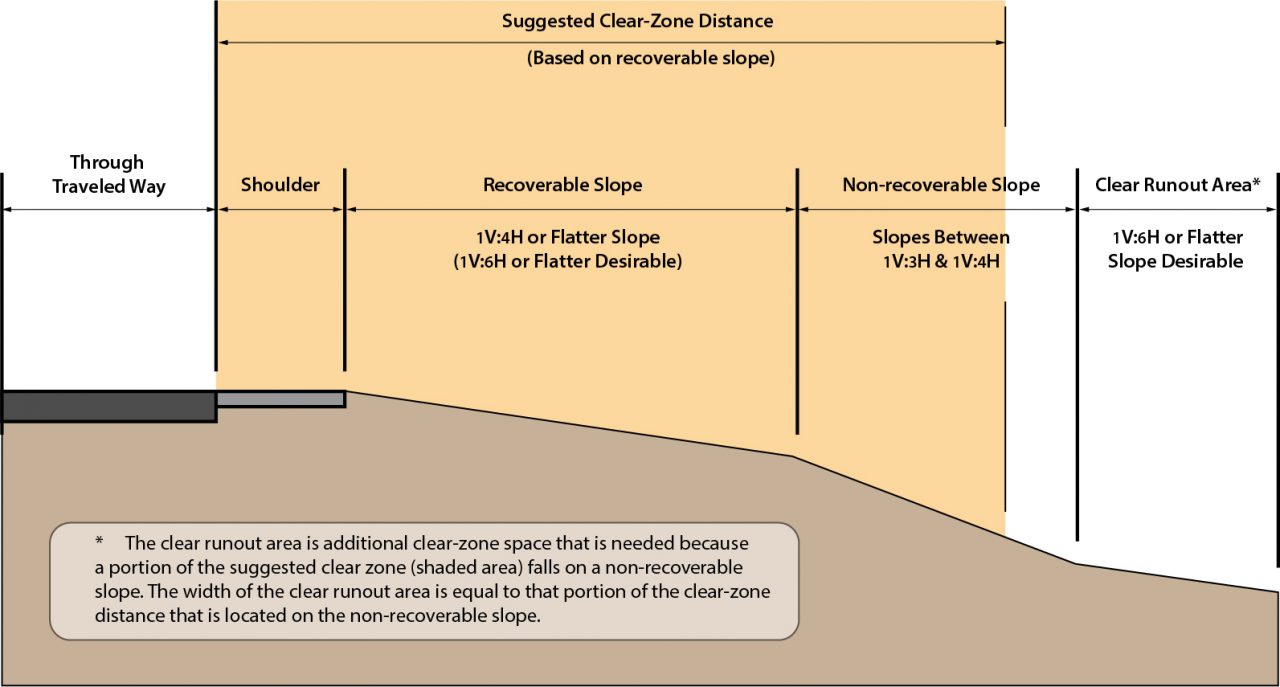
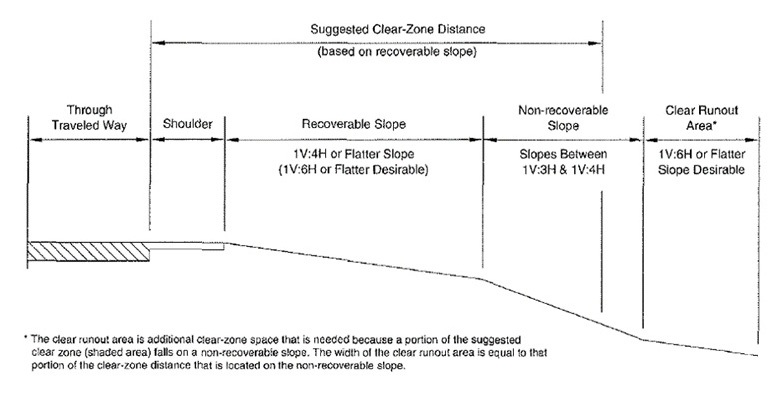
The American Affiliation of State Freeway and Transportation Officers (AASHTO) Roadside Design Information is a cornerstone of freeway security engineering. Inside this complete doc lies a essential software for minimizing the severity of run-off-road crashes: the clear zone chart. This chart, a visible illustration of acceptable encroachment distances based mostly on design velocity, is essential for guaranteeing that drivers who go away the traveled manner have a adequate space to get better or reduce the influence of their departure. Understanding and accurately making use of this chart is paramount for designing secure and environment friendly roadways. This text delves into the intricacies of the AASHTO clear zone chart, exploring its parts, software, limitations, and evolving concerns in trendy roadway design.
Understanding the Idea of Clear Zone
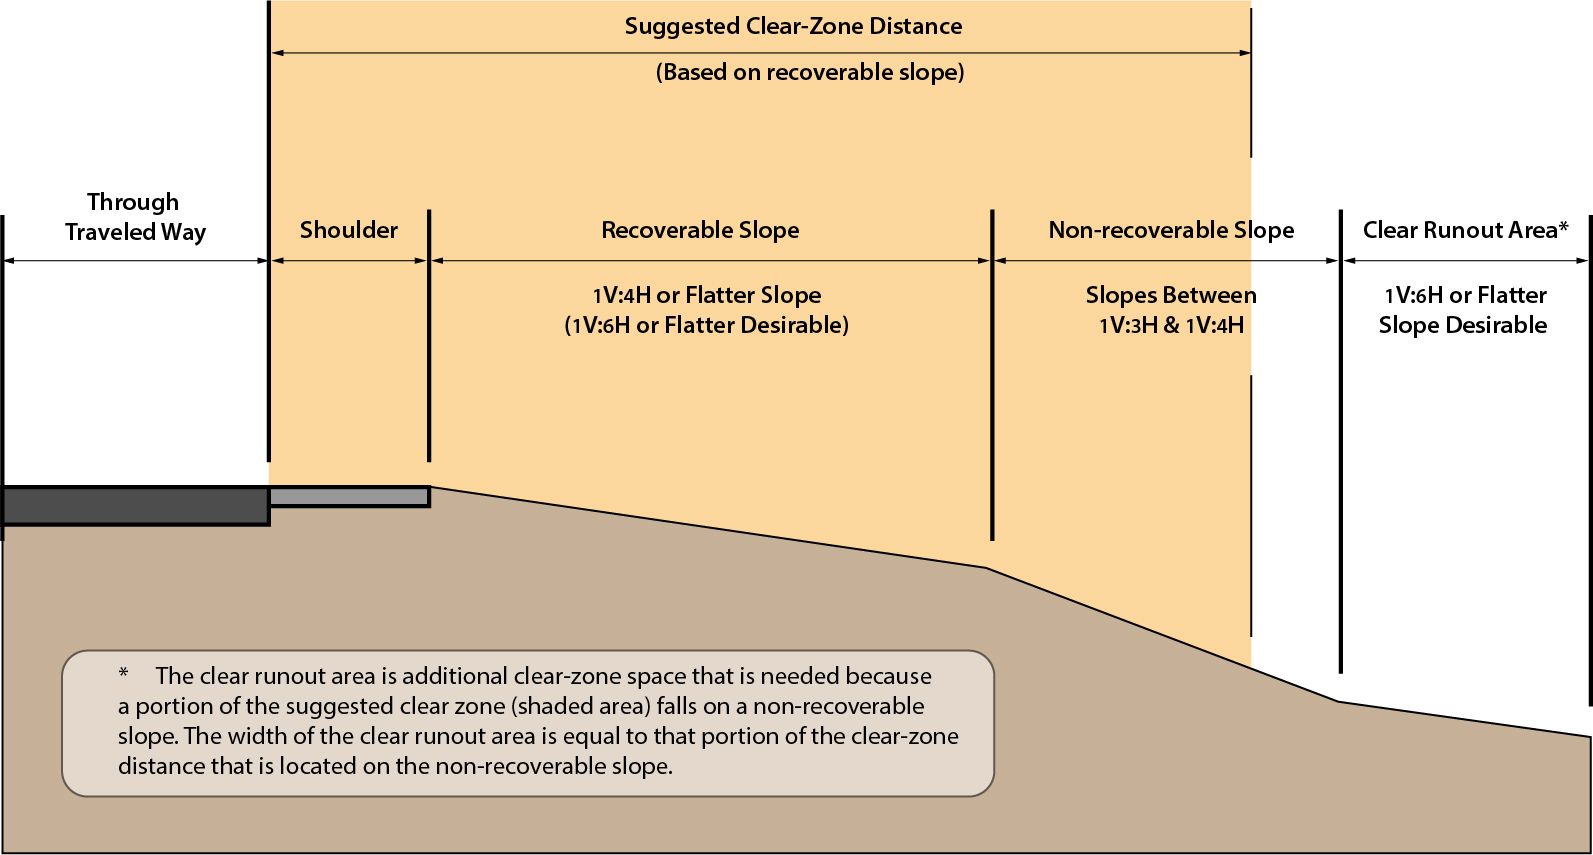
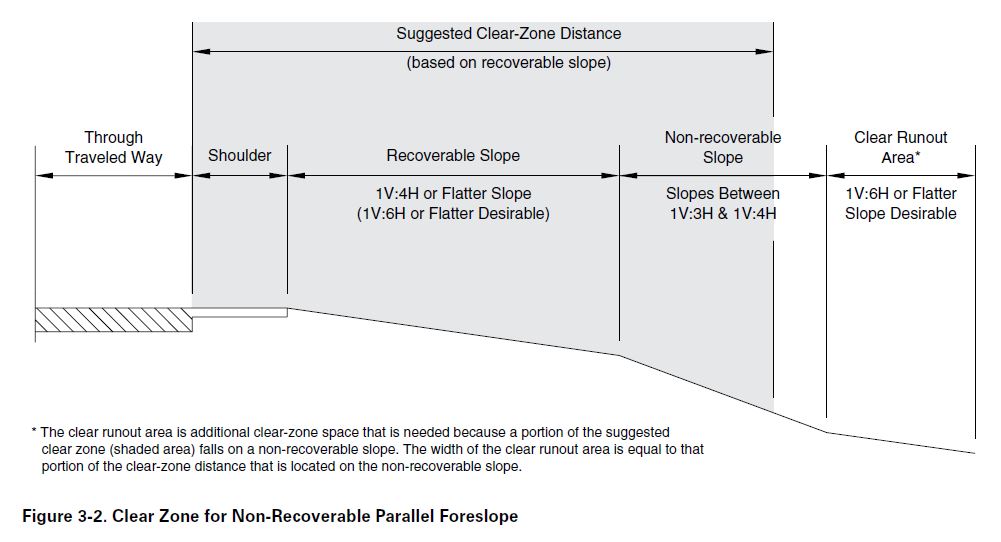
The clear zone, as outlined by AASHTO, is an space extending from the sting of the traveled manner to a degree past which roadside hazards are managed. This hazard-free house permits errant automobiles to get better management or, if a crash is unavoidable, supplies a zone the place the severity of the influence is minimized. The clear zone just isn’t merely an empty house; it is a rigorously designed space free from mounted and roadside hazards that might exacerbate a run-off-road occasion. These hazards embrace:
- Fastened Objects: Bushes, utility poles, indicators, bridge rails, and different immovable constructions.
- Roadside Options: Steep slopes, ditches, culverts, and different topographical options.
- Obstacles: Particles, rocks, and different probably hazardous supplies.
The AASHTO clear zone chart straight addresses the spatial necessities for this hazard-free space, guaranteeing its adequacy based mostly on the design velocity of the roadway. Increased design speeds necessitate wider clear zones to supply drivers with extra response time and restoration distance.
Deciphering the AASHTO Clear Zone Chart
The chart itself is a graphical illustration of the minimal required clear zone width as a operate of design velocity. It usually presents the clear zone width on the vertical axis and the design velocity on the horizontal axis. The ensuing curve illustrates the connection between these two parameters. Whereas the precise values could fluctuate barely relying on the version of the AASHTO Roadside Design Information, the elemental precept stays constant: increased speeds necessitate wider clear zones.
Key Parts and Interpretations:
The chart normally contains a number of key parts:
- Design Pace: That is the utmost secure velocity for which the roadway is designed. It is essential to precisely decide the design velocity earlier than consulting the chart.
- Clear Zone Width: That is the minimal horizontal distance from the sting of the traveled method to the closest hazard. The chart supplies this worth based mostly on the design velocity.
- Forms of Roadways: The chart could differentiate between totally different roadway varieties, equivalent to freeways, rural highways, and concrete streets, as their design necessities could fluctuate.
- Terrain Issues: The chart can also account for terrain traits, equivalent to slopes and curves, which affect the required clear zone width. Steeper slopes and sharper curves usually require wider clear zones.
- Restoration Space: Whereas not all the time explicitly proven on the chart, the clear zone typically incorporates a restoration space, which is a portion of the clear zone particularly designed to permit automobiles to regain management. This space is normally designed with a comparatively flat and steady floor.
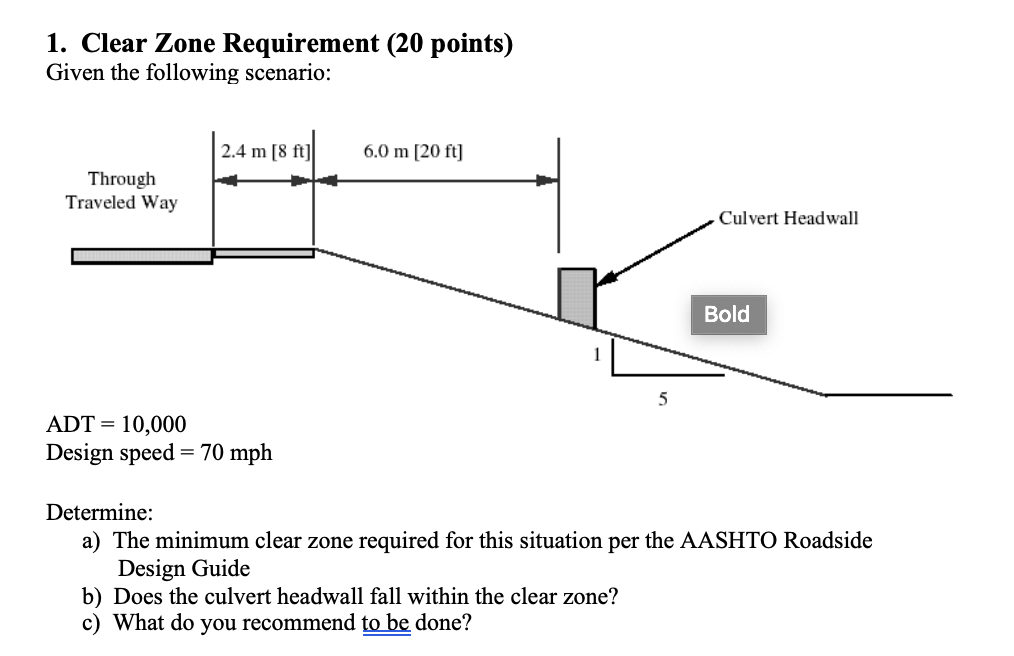
Making use of the Chart in Roadway Design
Utilizing the AASHTO clear zone chart entails an easy course of:
- Decide the Design Pace: That is established throughout the preliminary phases of roadway design, contemplating elements like terrain, sight distance, and anticipated site visitors quantity.
- Find the Design Pace on the Chart: Discover the design velocity on the horizontal axis of the chart.
- Establish the Corresponding Clear Zone Width: Hint a vertical line from the design velocity to intersect the curve representing the suitable roadway sort and terrain.
- Decide the Minimal Clear Zone Width: Learn the minimal clear zone width from the vertical axis on the level of intersection.
- Incorporate the Clear Zone into the Design: Make sure that the design incorporates a transparent zone of at the very least the minimal width decided from the chart, free from any hazards.
Limitations and Issues
Whereas the AASHTO clear zone chart is a crucial software, it has sure limitations:
- Simplified Mannequin: The chart presents a simplified mannequin and should not absolutely account for all doable variables affecting run-off-road crashes. Components equivalent to driver habits, automobile traits, and particular crash eventualities aren’t explicitly included.
- Common Situations: The chart represents common situations and is probably not appropriate for all conditions. Uncommon terrain, distinctive climate situations, or particular website constraints could require changes to the minimal clear zone width.
- Dynamic Nature of Roadside Hazards: The chart addresses mounted hazards, nevertheless it does not account for the dynamic nature of roadside hazards, equivalent to particles from accidents or short-term obstructions. Ongoing upkeep and hazard administration are important.
- Evolution of Design Requirements: AASHTO tips are periodically up to date, so it is essential to make use of essentially the most present model of the Roadside Design Information and its related clear zone chart.
Past the Chart: Fashionable Approaches to Roadside Security
Fashionable approaches to roadside security lengthen past merely adhering to the minimal clear zone necessities. These embrace:
- Roadside Security Audits: Impartial assessments of roadway designs to determine potential hazards and enhance security.
- Mitigation Measures: Implementing particular measures to mitigate the severity of run-off-road crashes, equivalent to utilizing breakaway utility poles, energy-absorbing boundaries, and improved roadside drainage.
- Simulation and Modeling: Using superior simulation strategies to evaluate the effectiveness of various design choices and predict crash eventualities.
- Information-Pushed Design: Using crash knowledge evaluation to determine high-risk areas and tailor design options to particular wants.
Conclusion:
The AASHTO clear zone chart is an indispensable software for guaranteeing roadside security, offering a quantitative foundation for figuring out the minimal hazard-free house wanted to mitigate the severity of run-off-road crashes. Nonetheless, it is essential to grasp its limitations and contemplate the broader context of recent roadway design. By combining the chart’s steerage with complete security audits, modern mitigation methods, and data-driven approaches, engineers can attempt to create roadways that aren’t solely environment friendly but additionally prioritize the security of all customers. The continuing evolution of AASHTO tips underscores the dedication to steady enchancment in roadside security engineering, guaranteeing that future roadways are designed with the very best doable requirements of safety. Correct understanding and software of the AASHTO clear zone chart, together with a holistic method to roadside security, are very important for minimizing the tragic penalties of run-off-road crashes.


Closure
Thus, we hope this text has offered beneficial insights into Navigating the AASHTO Clear Zone Chart: A Complete Information to Roadside Security. We hope you discover this text informative and helpful. See you in our subsequent article!